Wednesday, 2 November 2011

Jean Bernard’s camera...The box brownie camera.

Jean Bernard’s camera...The box brownie camera.

 Other cameras dating back to that time were beautiful and designed with meticulous hand, however, these cameras would have been too complex and fragile with all the brass fittings to be taken to war. Although a professional photographer would have had an expensive and advanced camera, it would have been impractical for Jean to take this to war. He would need a much sturdier camera that would sustain being carried around in a bag, moved and dropped a number of times. IT also had to be cheap and light. A box brownie would suit this purpose, its hard shell is a box, which would have fitted nicely in a bag and would have sustained being dropped. With the added handle it would have been easy to carry around. The model Jean would have had would have been the most recent box brownie in production as he would have had it supplied to him first before he went to war. The Box brownie used would have been a No. 2, Model D Box Brownie. Box Brownie started production in 1914 and continued production through the First World War. This brownie model had A, B, and C produced before, the Model E was introduced in 1919.

Model I am going to attempt to make.

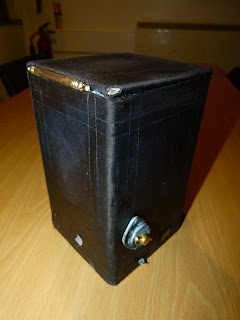
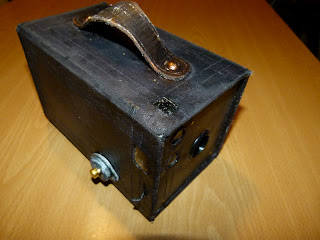
Final Outcome.
  • First step is to measure out the sizes of the 4 sides of the camera and draw the rectangles on to a 3mm sheet of MDF.

·         The second step is to cut out a rectangular shape out of poly urethane.

·         Stick the four rectangles of MDF to the four sides of the poly urethane.

·         Fill in any gaps around the edges with poly filler, once dry, sand down.

·         measure the inside area of the front and the overall area of the back, draw the shapes on to MDF and cut out the shapes for the front of the camera and the back.

·         Draw all the accessories out on the box and drill and cut out the necessary holes and slits.

·         Cover the box tightly in leather.

·         Score the lines that are the detail on the leather on with a ruler.

·         Carve the grommets into the size circles needed for the three lenses.

·         Carve the lenses for the three holes and stick in.

·         Makes the turning key for the outside out of MDF, Grommets and a radiator key.

·         Cut out rectangle lenses for the two rectangle holes and glue in.

·         Cut out the handle and sand down, use two screws to attach to the box.

·         Apply the necessary paint and stand down.


No comments:

Post a Comment